Mounting Snow Chains

Step 1: Be prepared before your journey
What do I need to consider when preparing to mount my snow chains?
In addition to choosing the right size of snow chains for your car, there are a number of things to keep in mind before you even assemble your snow chains. A solid surface and a good pair of mounting gloves for snow chains can be very useful to make the process as easy as possible. You can read more about this below.
Make sure the ground is dry
You will have to sit on the ground on your knees while assembling your snow chains. There is a very strong chance that the ground at that time is covered with snow, ice, mud, and other muck; not pleasant to kneel in. We therefore advise to take something with you to sit on while mounting your snow chains. An old blanket or towel, but also a plastic bin bag or (rubber) beach mat are excellent options and can be thrown away immediately afterwards. If you have not thought of a suitable surface, you can always take the floor mat out of your car and have it cleaned later.
Assembly gloves
Mounting snow chains with your bare hands is certainly no fun. Ice, snow, and cold wind can turn your hands into ice cubes in no time and, moreover, they will quickly become completely smeared with any dirt, snow, or ice on your tyres. Don't waste a good pair of winter gloves to assemble your snow chains, we recommend that you purchase mounting gloves. The gloves from our collection are specially made to protect your hands and sleeves and also ensure that you stay nice and warm.
In addition to having a good surface and mounting gloves, it is also useful to take a torch or head lamp with you. This will come in handy if you are driving at night or in the evening, or if there is little light due to other circumstances. In addition, make sure that you store the snow chains in an accessible location in your car. Place them on top of or alongside your luggage so that you can easily reach them when needed. Please note: do you have rims with hubcaps? Then we recommend removing the wheel covers at home, as snow chains can damage them.
Step 2: Practise at home!
Practise mounting your chains at least once
It may sound very cliché, but practise makes perfect! Before you leave for a winter sports holiday or before the snow comes, practise mounting your tyres at home. By doing this, you will not be confronted with any nasty surprises along the way. Please read the instructions for your snow chains carefully before fitting them and practise fitting them on a dry day. If all goes well at home, it will certainly go well on the road!
Step 3: Mounting your snow chains
Winter tyres offer very good performance in winter conditions and these often ensure that you do not have to use the snow chains. Unfortunately, it can still happen that you will still have to use your snow chains at home. It is, therefore, very important that you know how to assemble them. Below you will find some handy tips.
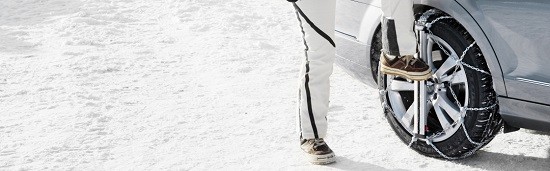
Assembly
Before mounting the snow chains, first make your wheel arches snow-free. Make use of the instructions that are provided with your snow chains and double check that everything is properly secured before you start driving. Depending on the type of snow chains that you have purchased, you may need to re-tighten the chains after driving 20 metres. In any case, we recommend checking after 10/20 metres that everything is properly tensioned and secured to prevent damage.
Where do I mount the snow chains?
Snow chains are always mounted on the driven axis of your car, so on the front tyres if you have front-wheel drive and the back tyres for rear-wheel drive. Do you have a car with four-wheel drive? Then it is usually recommended to mount the snow chains on the front wheels of the car. Note: always check in advance with the manufacturer of your car or the instruction manual of your car where the snow chains must be mounted. This way you prevent any unwanted damage or extra work.
Don't drive for too long
Snow chains are not a replacement for winter tyres and should only used in severe weather conditions. It is therefore important that you do not drive on them for too long. If road conditions improve or if signs indicate that they are no longer needed, remove the snow chains from your tyres. Conversely, do not wait too long to assemble the snow chains, because before you know it, you can be on a mountain pass where you can no longer stop the car.
NOTE: Every type of snow chain has its own way of being assembled. Therefore, you must always read the instruction manual thoroughly before you start. Under most of our products, we have posted instructional videos about the assembly of the chains. If available, we recommend watching these and using them as aids while practising.
Step 4: After mounting your snow chains
Maximum speed with snow chains
After successfully assembling the snow chains, you can finally hit the road. There are a number of things to keep in mind while driving. For example, take the maximum speed into account. Logically, you cannot drive as fast with snow chains on as when you have normal (winter) tyres, so check in advance in the manual how fast you can drive with the chains on. Most brands use a maximum speed of 25 to 30 mp/h (40 - 50 km/h).
Cleaning your snow chains
After use, it is wise to rinse the snow chains with water and let everything dry thoroughly. In this way, you prevent any corrosion and you do not have to worry about rust on your snow chains. Cleaning your chains properly means that you can continue to use them for a long time.
Do you still have questions about snow chains after reading our tips and tricks? Feel free to contact our customer service for any additional information. In addition, you can of course also consult our other advice pages that provide advice on choosing the best type of chains or the legislation in countries where snow chains are mandatory.